Exercises After Total Hip Replacement or Resurfacing
It is hard work being a patient! Of course, one of the main reasons for undertaking joint replacement and resurfacing surgery is to restore to a patient a level of mobility which did not exist before the procedure. Consequently, the very moment surgery ends is when activity should begin. This activity is in part undertaken by the patient alone and in part guided by a specialist in rehabilitation, be that a physiotherapist, osteopath, chiropractor, physical therapist, or other individual skilled in post-operative care. The exercises which follow are taken from Richard Villar’s book Understanding Hip & Knee Arthritis Surgery (Family Doctor Books) and can help form the core of any hip replacement or hip resurfacing rehabilitation programme.
Early postoperative and bed exercises
1. With the legs straight, pull your foot up towards you until your toes are pointing to the ceiling. Then point your toes and feet down towards the end of the bed. Stretch your feet and toes each way as far as possible.
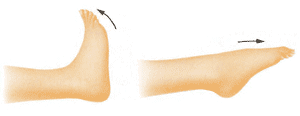
2. Circle both feet round in each direction.

3. Tighten the muscles in both your thighs, pushing your knees down firmly into the bed.

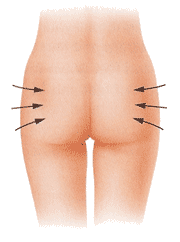
4. Squeeze your buttock muscles tightly together, then relax.
5. Bend your hip and knee gently upwards, then lower slowly. Do not pull your leg up by hand. Do not bend the hip joint to more than a right angle. It may be necessary to use a sliding board to assist with this exercise.

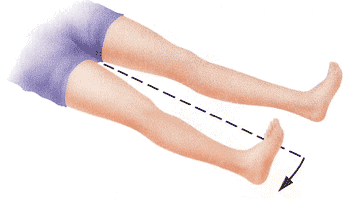
6. Lay your legs straight out in front of you, then tighten the muscles and slide your leg towards the edge of the bed and back again. Do not move the leg across an imaginary line running down the centre of your body, do not roll your leg outwards and keep your toes pointed towards the ceiling throughout.
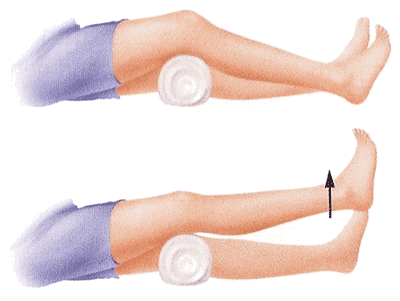
7. Place a rolled-up towel under your knee. Straighten your leg, tensing the muscles so that your heel lifts up off the bed, keeping the back of your knee in contact with the towel at all times. Lower your heel slowly back to rest on the bed.
Exercises to do when you are able to sit in a chair or walk
These exercises should be performed only when you are able to sit or stand independently.
 Sitting
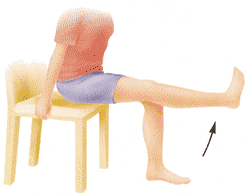
1. Sitting on a high chair, slide your bottom to the front of the chair. Both feet should be firmly placed on the floor and take great care not to bend the hip to more than 90 degrees. Straighten your leg and tense your muscles to raise your foot off the floor. Keep your toes pointed up towards the ceiling and hold the position for five seconds. Then lower your leg carefully towards the floor.
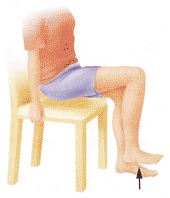
2. Adopt the same position as in exercise 1 above. Lean against the back of the chair and gently lift up your thigh, raising your foot from the floor and keeping your knee bent. Do not flex your hip through more than a right angle. Then lower your leg, putting your foot back on the floor. Do not pull your leg up with your hands.
Standing
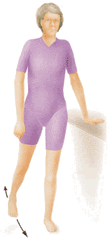
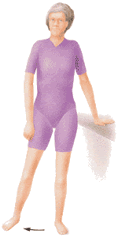
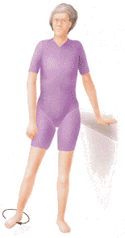
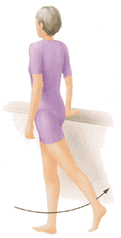
The following exercises are for the operated leg only. You should stand straight, though it may be necessary to hold onto something to balance. The upper body should not be moved and the foot of the operated leg should not touch the floor during these exercises.
|
|
|
1. Keeping your leg straight, slowly swing your leg forwards and backwards, leaning ever so slightly to the opposite side so that it can swing without touching the floor. |
|
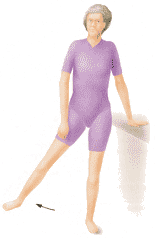
2. Swing your leg sideways away from the body and then back to the centre. Keep your kneecap facing forwards at all times and do not cross your legs. |
|
|
|
3. Swing your leg gently round in a circle – front, side, behind and return. |
|
4. Swing your leg forwards to an angle of 45 degrees from the vertical and hold that position for a count of five. Then lower your leg and swing it gently back as far as possible. Hold that position for a count of five then lower. |
 |
||
5. Swing your leg out to the side at an angle of 45 degrees from the vertical and hold it there for a count of five. Then lower, Do not let your leg come further back in than the centre of your body and keep your upper body still. |

